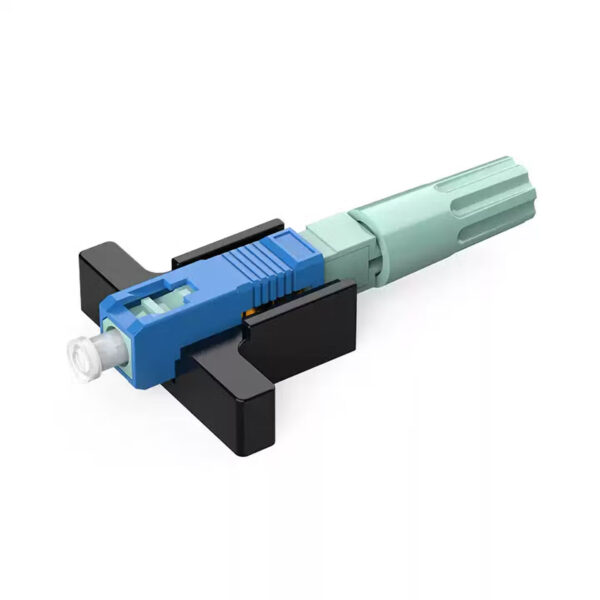


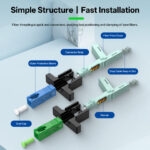
The type of fast connector (SC APC/UPC) for FTTH deployments makes the installer’s work much easier when using this type of connector. Instead of needing to use an expensive fusion splicer to connect drop cables, installers can simply strip the cable, cleave the fiber, and insert the fiber through the rear of the connector, then flip the cover for final assembly and pressure-lock. This allows for a much faster installation process and saves the installer many hours of labor when installing new residential services or extending larger networks.
Why Choose This Fast Connector?
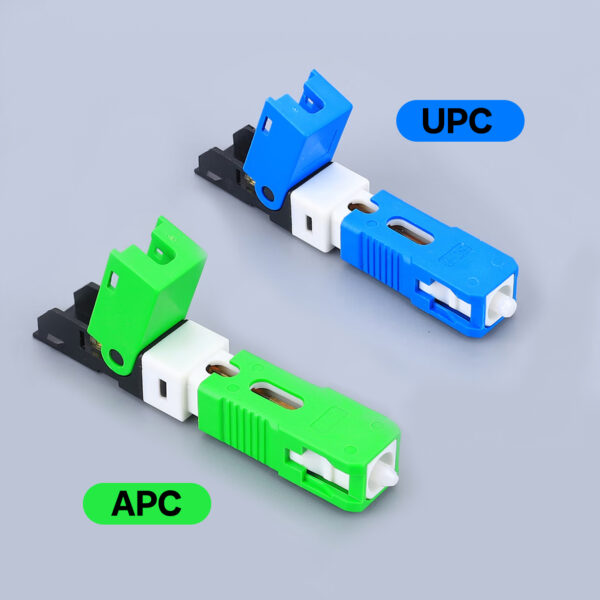
Speed and reliability are paramount to field technicians. The fiber connector easily fits from the back of the connector, “pushes” the fiber through to the connector’s front, creates a slight bend (for correct alignment), and then clamps the fiber in place by flipping the cover down. For standard data networks (Home Internet Services), the UPC connector will work fine. Switch to the APC type if you require lower levels of reflection for video transmission (such as in CATV applications).
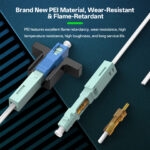
The ceramic ferrules are used to provide tight core alignment for the most reliable connection. The PEI housing is designed to resist heat, scratches, and everyday use, making it ideal for use in outdoor cabinets and harsh environments.
Application Fit
This connector suits various applications. Applied to home networks, the connector allows for fast drops into homes. Cameras in security systems benefit from a fast connection, as they will experience reduced downtime. FTTH deployments can span entire neighborhoods efficiently with this connector. Connections for high-speed rail networks and smart buildings must be able to withstand severe environments; this connector meets that requirement. APC polishing ensures signal integrity for CATV applications. Maintaining the connector is also easy—standard tools, such as a cable stripper and cleaver, can perform all maintenance tasks.
Installation Steps
The following tools are needed to perform the fiber optic splicing process: fiber length gauge, drop cable stripper, 3-hole fiber stripper, precision cleaver, alcohol wipes and lint-free paper. Always work in an environment free of dirt or dust to prevent contamination from harming the completed connection.
Preparation
- Remove the Jacket: Utilizing the drop cable stripper, remove 5cm of the outer sheathing (jacket) from the 2×3 drop cable. It is important that the internal fibers not be damaged when removing the jacket.
- Insert into Gland: Push the stripped cable firmly into the connector’s “gland slot”. You will feel it snap into place once the connector has made contact with the stripped cable.
- Lock with Four Points: Lock the cable into the connector body using 4 internal locking points. To ensure the cable is locked firmly and does not move, pull the cable away gently to check.
Cleaning & Cleaving
- Remove the Coating: Put the fiber over the length gauge, then using the 3-hole stripping tool, take off the coating that is beyond the length gauge markings until 10–15mm of fiber is exposed.
- Clean with Isopropyl Alcohol: Dip a piece of lint-free paper in isopropyl alcohol and wipe the bare fiber core from end to end until all residue is removed. Allow the core to air dry for approximately 10 seconds.
- Cleave the Fiber: Place the cleaned fiber into the cleaving tool and make a smooth flat cut perpendicular to the length of the fiber.
Insertion
- Unlock the Connector Shell: Slide the housing backwards to unlock the connector and free up the path for the fiber to be inserted.
- Insert the Fiber: Feed the cleaved end of the fiber into the back end of the connector. Slowly advance the fiber until it forms a visible micro-bend (fiber bow) and reaches the ferrule at the end.
- Lock the Shell: Move the black shell completely to the front of the connector. You should hear or feel a click, indicating that the fiber is locked into position at the front of the connector.
- Secure the Flip Cover: Fold the flip cover over the fiber and press firmly against it to secure and seal the fiber into place.
Final Check
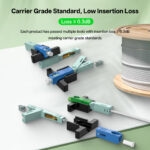
- Final Inspection: Inspect the complete assembly to ensure proper and tight fitment. To verify the insertion loss of the assembly, it should not exceed 0.3dB.
If you practice the complete process, it will require only 1–2 minutes to complete a connection. As with all splicing work, a clean cut and proper fiber alignment are critical for achieving optimal low-loss results.
Common Issues and Fixes
High signal loss or no signal at all can occur during a bulk installation. To remedy this, check the length you cut against the provided length gauge; using the wrong length will cause it to not line up correctly. Then check your cleaver blade to see if it is producing flat ends that are square when cut; worn blades will produce an angled cut which increases the potential for signal loss. Only use a gentle bend on the bare fiber; excessive bending will misalign the fibers.
Selection Guide
| Feature | 3L Nut Type | Gland Type |
| Locking Mechanism | Threaded screw‑nut locking | Flip‑cover or push‑latch lock |
| Best For | High‑tension, outdoor environments | Rapid indoor deployment & tight spaces |
| Tensile Strength | Superior (>50 N) | Reliable (>30 N) |
| Installation Speed | 90–120 sec | Excellent (~90 sec) |
| Reuse Cycle | 50+ times (Non‑destructive) | 50+ times (Snap‑lock mechanism) |
| Typical Use | Aerial drops, Building backbones | FTTH residential ONT, Indoor wall outlets |
Full Specifications
| Parameter | Specification |
| Product Type | Fast Connector (SC APC/UPC) |
| Insertion Loss | ≤0.3dB |
| Return Loss | ≥50dB |
| Wavelength | 1260nm~1650nm (Tested at 1310/1550nm) |
| Cable Type | 2×3 Drop Cable (Flat/Butterfly) |
| Operating Temperature | -40°C to +75°C |
| Ferrule Material | Ceramic |
| Housing Material | PEI (Flame-retardant, durable) |
| Dimensions | 5.8 x 0.9 x 0.9 cm (3.5 cm width with cover opened) |
| Standards | Telecom Grade |
| Package | 50pcs per set |
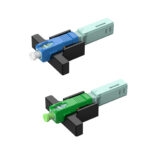
| UPC Polish | Physical Contact (PC) / Spherical (Blue) |
| APC Polish | 8° angled (Green) |
Ordering Information
50pcs per set. Includes dust caps. Pre-tested and ready for immediate FTTH deployment. Bulk packs suit residential, security, and CATV projects.

Reviews
Clear filtersThere are no reviews yet.