Fiber Optic Tools
How to Build Your Fiber Optic Tool Kit: A Guide for Beginners & Pros
Have you ever had challenges working with incomplete tools or losing your signal due to dirty or dusty connectors? Whether a novice or an established fiber optic expert, having tools designed for your particular needs will enhance both the quality and efficiency of your work. This in-depth guide will examine the fiber optic tooling categories you need to know: fiber optic cleaners, tool kits, and strippers. We’ll explain why each one matters and how to make good choices, in addition to how your current workflow impacts tooling decisions. We will use first principles thinking, quantitative interaction, and practical tips to help you develop and improve your own fiber optic tool kit that aligns with what’s available.
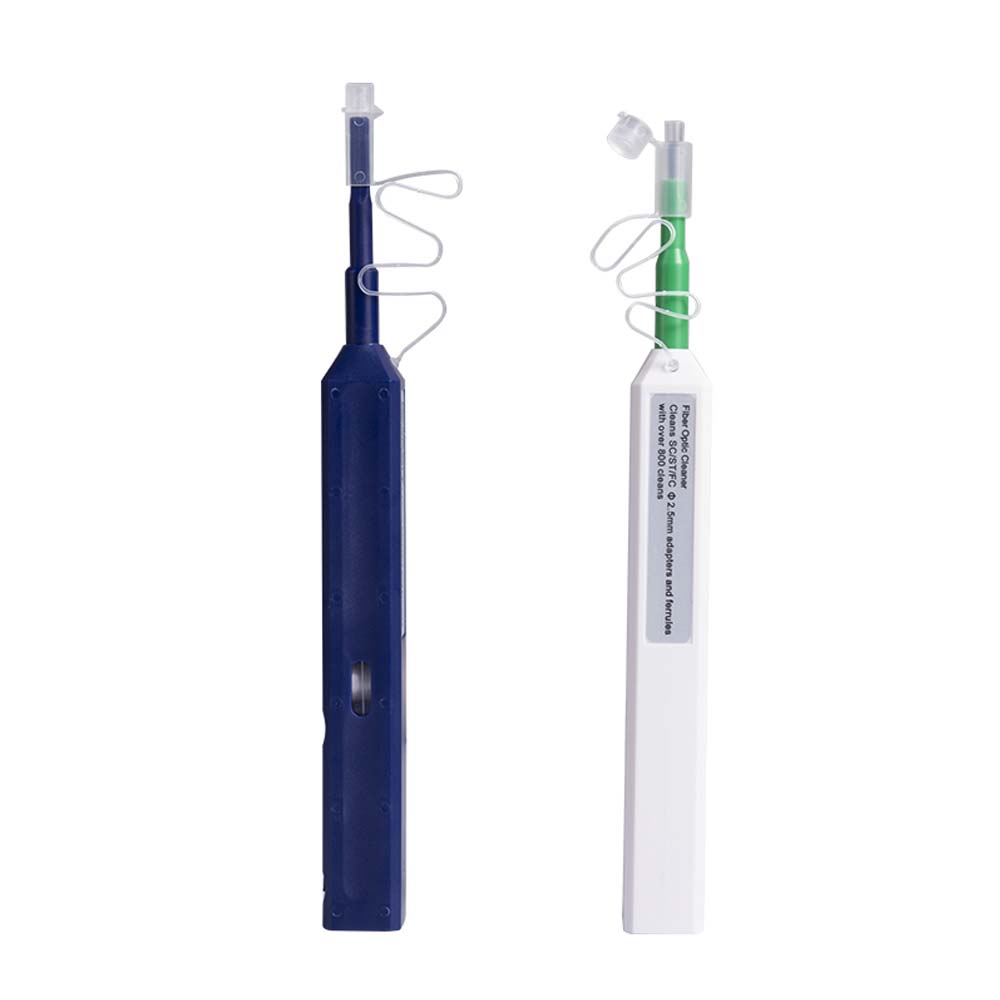
Fiber Optic Cleaner — Why Keeping Fiber Links Spotless Matters
When you think about fiber optic transmission, imagine a laser beam racing down an ultra-smooth glass highway. Any little piece of dirt, oil, or debris becomes a roadblock to that light beam, scattering it or absorbing it somewhere else along the journey. Even small amounts of contamination will create back reflection and attenuation, which will degrade your performance.
For instance, if you take a connector (cable) that has been measured at a 0.48 dB loss before cleaning (and 0.3 dB is ideal, with even lower values being better), after performing a proper fiber optic cleaning using the right fiber cleaning tools, you could reduce the loss to below 0.05 dB (its performance improved more than tenfold).
Some Use Cases:
- Cleaning the connectors and end faces before splicing or connecting fiber can save you rework costs.
- Cleaning during maintenance cycles may help save unexpected downtime during network operations.
A Few Recommendations:
- A kit for a beginner or DIY installer would simply include fiber optic cleaning wipes (alcohol) and cleaning sticks. Kits typically range from $15–$30, and for most home/small office patching jobs, this is sufficient.
- A kit for a professional technician will include all of the above, plus an inspection microscope, and possibly a Visual Fault Locator (VFL) to check the cleaning before making the connection. Kits like this can run $200 or more, but they will reduce troubleshooting time significantly.
Cleaning Kits at a Glance:
| Feature/Kit Type | Basic Cleaning Kit | Professional Cleaning Kit |
| Components | Alcohol wipes, cleaning sticks | Inspection scope, VFL, lint-free swabs |
| Use Cases | Routine connector cleaning | Pre-installation cleaning, troubleshooting |
| Price Range | $15–30 | $70–300 |
Main Errors to Avoid:
- Continually cleaning with the same wipe, which pushes the dirt deeper.
- Using inappropriate solvents or household tissues that leave lint.
Tip: If you're just starting to get into fiber optics, get a starter fiber optic cleaning kit and make sure you use the proper cleaning motions. In addition, every professional should inspect each connection with a scope to guarantee cleanliness.
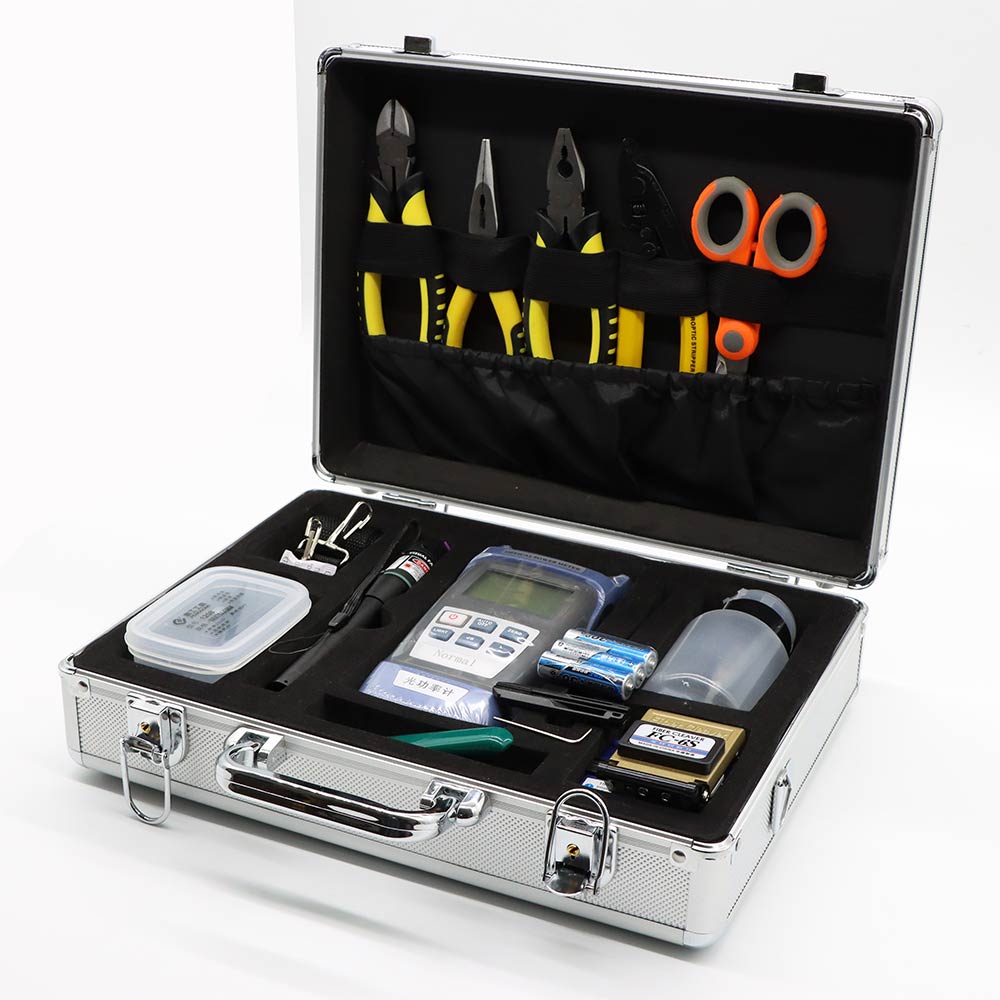
Fiber Optic Tool Kits — Designing Your Kit Based on Skill and Project
Not all fiber optic tool kits are created equal. Your toolkit should be tailored to fit your skill level and the complexity of the project. Think of two kitchens: the newly budding home cook only needs a basic set with a chef’s knife and a cutting board, while the gourmet chef’s kitchen includes a bunch of precise gadgets to make fine cuisine. The comparison fits — fiber optic tool kits range from basic to very involved.
Categorized User Profiles and Recommended Kits:
| Scenario | Essential Tools | Recommended Upgrades | Typical Budget |
| Home/Office DIY | Fiber optic strippers, cleavers, cleaning kit | Basic visual fault locator | $60–$120 |
| Small Business / Campus | Added inspection scopes, mid-grade testing gear | Mechanical splicer, VFL | $200–$600 |
| Industrial / ISP / Data Center | Fusion splicer, OTDR, heated strippers | Fiber microscope, modular kits | $1,500–$5,000+ |
In-Depth Example:
- As a DIY fiber optic user, Jane uses a basic fiber optic kit that contains a handheld stripper, basic cleaver, and cleaning tools to maintain her gigabit fiber at home. She knows the advantages of keeping her installation in good condition, and she can afford to do it with inexpensive tools that do not break the bank.
- Carlos is a data center technician, and does construction, maintenance, and repairs on a large scale. His advanced kit includes fusion splicer tools, an OTDR for testing, and tools that strip thermally installed fiber. When things go wrong, he relies on advanced tools and equipment to quickly and effectively diagnose the issue and make repairs so that they do not end up paying thousands for time and downtime.
Functional Model Nature of Your Kit:
- Cutting: Cable cutters, jacket slitter knives
- Stripping: A high-precision fiber optic stripping tool
- Splicing: A fusion and mechanical splicing tool
- Testing: Power meter, VFL, and OTDR
- Cleaning: Fiber optic cleaning kit
The use of a modular fiber optic tool kit will allow you to scale and customize your fiber optic tool kit based on the needs of the growing project scope. This will best adapt your kit to your financial needs, while also preparing you for future industry standards for fiber optic installs.
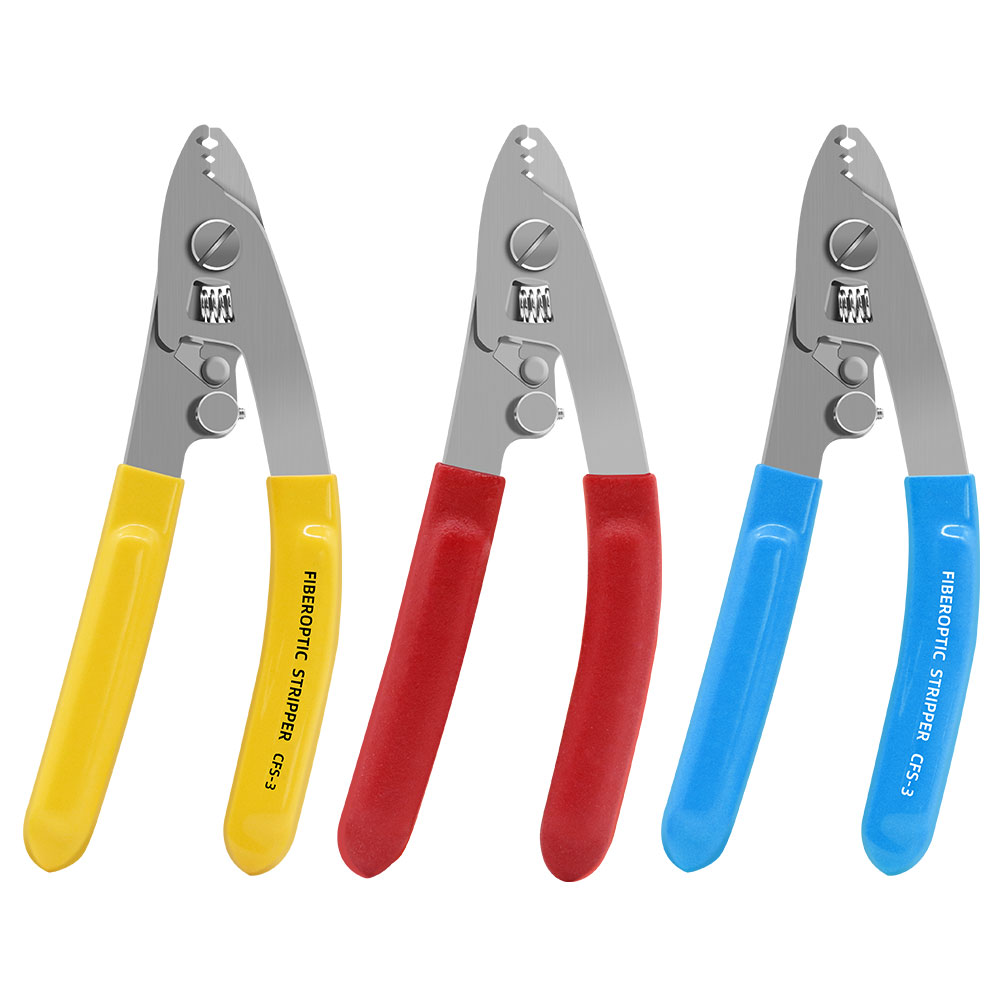
Fiber Optic Strippers — Avoiding Invisible Damage in Cable Prep
Stripping fiber optic cable is a delicate task. The goal is to remove the outer coatings without nicking the inner glass fiber. Certainly, the damage could amount to some micro-cracking that would be invisible to the naked eye but could result in signal loss or failure down the road.
To provide the best approach to stripping fiber optic cable, I will discuss a number of different methods, and share some pros and cons, deciding between mechanical or thermal options.
Considerations when deciding between mechanical or thermal are the following:
Mechanical (Manual) Strippers
- They can be very affordable and give you great control. They are effective when regularly stripping at home or an office, as well as when prepping indoor patch cables.
Thermal Strippers
- They rely on heat to soften the coating, which reduces mechanical stress to the fiber and can be an advantage in cold climates and industrial stripping situations.
What to Look for In a Stripper?
- Adjustable blade depth – for different cabling sizes and thicknesses
- Interchangeable blades – when you want to retain precision
- Ergonomic handles – for comfort, grip, and reliable control
When should I use this?
If you are just doing light patching of one or two strands, at home or in an office, mechanical strippers should suffice. If you are stripping hundreds of cables for industrial use or large-scale operations, then I would suggest using thermal strippers for efficiency and to reduce the risk of error.
Essential Splicing and Termination Tools — Making Connections That Last
Joining fibers requires skill and appropriate tools. Fusion splicing and mechanical splicing serve different needs.
Comparing Methods:
| Method | Avg. Loss | Cost per Splice | Setup Time | Ideal Use Case |
| Fusion Splicing | 0.02–0.05 dB | ~$2 (consumables) | ~2-4 minutes | Backbone networks & permanent installs |
| Mechanical Splicing | 0.1–0.3 dB | $6–$12 | <2 minutes | Quick repairs, temporary fixes |
Fusion splicing tools that use core alignment technology can achieve ultra-low splice loss, sometimes as low as 0.02 dB, and some even measure loss in real-time during the splicing process. The initial price point (often greater than $1,500) is well worth it for mission-critical and/or long-haul applications.
Though mechanical splicing does have practical appeal for cost-sensitive or urgent situations (as it does incur slightly higher insertion loss and lower durability), one should revisit fusion splicing to compare results regarding decreases in their fused splice loss.
Termination tool kits, which consist of crimpers, polishers, and connector installation tools, are great for getting things done more quickly and adding (equally) a higher degree of consistency in manual techniques to your connectors.
Tip: Estimate your splice volume and the degree of criticality to help decide which splicing solution fits better.
Advanced Testing and Troubleshooting Tools — Staying Ahead of Network Issues
Updated fiber optic testing devices lead to faster diagnoses with increased accuracy.
- Graphical OTDRs create a visual fault map that detects breaks, bends, and even high-loss areas down the fiber path with pinpoint accuracy. Think of this feature in terms of guesswork.
- Visual Fault Locators (VFLs) emit visible red laser light down the fiber so you can easily see breaks or macrobending by the visible leak of red light.
- Additional testing devices exist, such as power meters and fiber microscopes, for certifying and validating installations more robustly and thoroughly.
- Finally, with the advent of new cabling technologies such as Single Pair Ethernet (SPE), there will be new cabling considerations for which fiber optic devices will be no exception. As these technologies come online, very close stripping and testing devices will be necessary.
- Furthermore, keeping your fiber optic troubleshooting kit updated with modular and firmware-upgradable devices will give you a level of future preparedness.
Build Your Fiber Optic Tool Kit with Purpose
Fiber optic cleaning supplies, toolkits, and effective precision strippers are at the center of every dependable fiber optic toolkit. Including well-selected splicing and testing tools will ensure a high level of connection integrity and professional reliability. Always consider your skill level, project size, and testing budget when selecting tools. Start with good, basic, multi-use tools and upgrade your toolkit as needs dictate.
You base your next project on the tool investment — get equipped today to increase quality, decrease failures, and provide efficient and high-performance fiber optic installations.